Sunday, 4 August 2013

Cookbook Mondays: Choc Chip Cookies & Carrot Raisin Spice Chewies


I won't be the first to admit it, but I do have a slight cook book addiction. Previously, I would snap up magazines and cook books that I knew in my heart of hearts I would likely rarely (alright I'll be honest NEVER) use or barely scratch the surface of. I was suckered in by all that food porn, the pretty pictures and the delicious descriptions. Occasionally I might get some out, flip through and vow to make something...but would usually end up making something else instead. and that's sad, because there is a lot of work that goes into cook books and I only think it fair to actually genuinely try to make a dent in the recipes of every book I buy. Otherwise, what's the point? And how will you ever learn something new?  So now that I'm a SAHW and part of my job is to keep the Beloved's treat tins filled, I decided to start blogging Cookbook Mondays. I'll be making something from a cookbook I own at least once per week and posting my success or failure. 

To start off with I decided to go with Isa and Terry's  Vegan Cookies Invade Your Cookie Jar because lets face it, if my hubby was a puppet he'd probably be the Cookie Monster. I have made a few cookies from the book with success before, but there are so many the logical thing to do was start from the beginning.

Choc Chip Cookies 

Hmmm. I was a little disappointed because I have used various recipes of Isa and Terry's and they are nearly always spot on for measurements. I was very surprised when I made the cookie dough and discovered it was more of a thick batter consistency. After double checking my quantities and not having made any errors, I started adding in more flour. I ended up using close to 3 cups instead of the original 1 1/2. Even allowing for humidity etc I can't understand why the batter was so wrong. After baking they turned out OK, not too sweet, although I hadn't increased the sugar to make up the flour, but that was OK by me because I'm not a super sweet tooth. It is a good basic vegan cookie, but lacking in a buttery choc chip cookie flavour if you know what I mean, so I probably wouldn't use this particular recipe again.

Carrot Raisin Spice Chewies
I really liked the flavour of these guys, and again, not overly sweet so I was pretty happy to dunk them in my EGT (earl grey tea). Like they say in the book, they are best eaten the day they are made, as they dry out a little, but I'm a dunker so being drier later on wasn't an issue. The only discrepancy with them was the recipe said to leave two inches between cookies (presumably as they would spread) but mine did not spread at all, so on my second batch I flattened them out so they weren't mounds. I did make the drizzle but did it in orange not lemon as I already used orange in the cookies and didn't want to be wasteful. Really good, I will definitely make them again (when I've worked my way through the rest!)

Friday, 2 August 2013

The New Life of a SAHW

Poppy, our sixth furkid
Awhile ago my husband took a leap, quit his job, and started his own business. It was scary, exciting, and nerve racking. To be honest, I was a little put out - I wanted to start my own business, and he had made this decision quite suddenly. BUT, we had talked about it, and although it worried me at first, we put my plans aside for awhile, and now my husband is quite a busy man! 

Life for me, however, was becoming quite dissatisfying. I was stuck in an office all day, and although getting catering requests was great, I wasn't getting enough time to do it, as well as a full time job and look after the Beloved, our house, and all the furkids. The Beloved was also getting bogged down with paperwork. We tussled with the idea of me quitting my job, but it had to be viable. So, we decided to take a trial just living off what the Beloved earned for a few months, to see if it were possible for me to quit my job, and build up my business while looking after his paperwork. Amazingly, it did work, so we thought about it a bit more, took the plunge, and I quit my job.

So here I am, a Stay At Home Wife. Some might say I have thrown away all my feminist principles, turned back time by 50 years, and agreed to  keep house, and look after my husband. Well, yes. On the other hand, I'm not doing it because I HAVE to do it, I'm doing it because I WANT to do it. I am lucky enough to have that choice, and lucky enough to have a husband supporting my ambitions too. I'm putting my business admin skills to use by helping him, and hopefully I will get busy enough running my own business as well. That aside, I quite like being at home to make sure everything is neat and tidy, the Beloved comes home to dinner ready for him, and I get to bake more often! He works very hard, starts early, and often gets home late. Its nice that he doesn't have to worry about helping me out with the house as well now. 

In order for catering to be doable for me, we are converting our sunroom into another separate commercial style kitchen so I can cook from home rather than hiring a kitchen and having to work around other people. This is quite an exciting process, so I will be posting the progress as we go. 

I also have a few other projects up my sleeve, but it does mean I will have more time to blog now, which is GREAT!!!   It also means I get more time with our six furkids (we just adopted another ex racing greyhound), and more time in God's creation, growing our own fruit and veg. 

And in case you were wondering (as a few people have asked me), I won't be changing my title in future to a SAHM. God just didn't make me to feel the urge to have some small humans, He blessed me with a love of animals instead :)

Saturday, 6 July 2013

Poached Pears in Spiced Pomegranate Syrup

Recently, Mrs Bean informed me she was scared of poaching pears! WHY?! I asked, a little confused. My dear friend and co conspirator confessed that she had never done it, and after watching Masterchef was afraid of her fruit becoming too mushy or being too hard. I don't watch it and had not witnessed the torture this simple thing had created for the contestants. Forget those pompous sillies on Masterchef my dear. Poach away. And if it is a little too mushy, who cares. George  and Gary will not be there peering and prodding! Matt will not be tasting and tutting!  I shake my wooden spoon at you fellows, scaring good cooks from venturing into poaching! After watching me do it recently, she admitted it looked easy enough... So this is for you my dear Bean, have no fear!

I like poached fruit in winter, but I'm not a huge sweet tooth so overly sweet syrups don't appeal to me. I like putting seasonal fruit together, and since buerre bosc pears and pomegranates are currently in season, they matched together beautifully.  If you can't get hold of a pomegranate, you can substitute the pomegranate juice sold in the supermarket (you may have to omit the sugar or the syrup could be too sweet). Pomegranate molasses are usually available from Indian or Lebanese grocers, health food shops, or delis. This recipe has lovely sweet pears in a tangy, spiced syrup that will warm you to the toes. And if George or Gary or Matt happen to pop by for a poached pear, bat them away with your spoon!

Because the syrup is so tart, I didn't want the pears to lose any sweetness, hence the first cook in water. It also makes it easier to gauge how firm/soft they are, and not keep checking the fruit. By leaving them to continue cooking with the heat off means you don't have to worry about poking your fruit constantly so that they end up looking more like swiss cheese! Then you can finish them off later without the stress ( if you have watched Masterchef and also stress about poaching LOL).

Ingredients
4 buerre bosc pears
1/4 cup pomegranate molasses
1/4 cup water
juice from 1/2 pomegranate
seeds from 1/2 pomegranate
1 tablespoon brown sugar
1/4 tsp mixed spice
splash lemon juice

Method
Fill a medium saucepan with water and a splash of lemon juice. Peel, halve, and core the pears. As you peel and core, slip them into the saucepan so they don't discolour. Make sure they are fully covered.
Bring the pan to the boil and leave the pears for approximately five minutes. Turn off the stove, and leave the pears for about 20 minutes in the saucepan. They will continue cooking as the water cools. Strain, and leave aside to cool completely. It is ok if at this point they are still a little firm, as you will heat again in syrup.
To make the syrup, but the water, molasses, pomegranate juice, sugar, and spice into a pan and bring to the boil. Turn down to low and put the pears back in, ensuring the syrup has been splashed all over them, and cover, leaving on a simmer for about 5 minutes. Test the pears with a skewer or tip of a knife, they should be soft enough to easily slide the knife tip or skewer in. If they are still hard, leave a little longer. Serve immediately as is, with fresh pomegranate seeds.


Champignon Bourguignon


It's been a little quiet on the blogging front of late. After I had some fun with some superhero snacks I've been busy just working and looking after Mr Sprout and the furkids. I've not been very inspired lately either, just tired I guess and in need of a rest. Sometimes it's all I can do to make dinner, let alone create for a blog. I have been trying to pick a recipe a week that I haven't tried before from my ever growing cookbook and magazine collection, but so often when we are short on time we stick to the speedy meals we know so well! But all that will shortly change...I'll be sharing more about that soon!

Being July the days are short and cold, the sun doesn't peek at us as often, and comfort food is so easy to reach for (and pack on some extra kgs!) Don't get me wrong, raw vegan is great and I eat a lot that way when its warmer. But there is nothing wrong in eating cooked food when it is cold, and also nothing wrong with a lashing of comfort food now and again, especially if your veggie intake is so high. If it's cold and the thought of a winter slaw makes you shudder, go and get the lentil soup. Or in this case, champignon bourguignon. I know what you're thinking, the beef version has high expectations, and doesn't it have mushrooms in it anyway, so just omit the poor dead cow, add some seitan? Yes and no.

I wanted this to be perfect comfort food, full of wintery flavours that warm you through. I looked at a few recipes for the omnivore version and played around with the flavourings. I didn't want this to be a mock meat version of the original, mock meat has a place and there are some truly great products out there, but I like to eat whole foods wherever we can (there are some mock meat products that I truly shudder when I read the ingredients list ). I don't think anything is missing with this version, truly.  I had the added joy of using homegrown shallots, garlic, and herbs; homegrown Russian kale, and made some dauphinoise with some  homegrown spuds to go with it. 

Guillame Brahimi has a recipe that involves pureed carrot to thicken and flavour the dish at the end so there is no need to add flour. I loved this idea because somehow using flour to thicken a red wine dish seems to make it go grey! It also means this dish is gluten free, even better! I decided to forgo the carrot, but some pureed beetroot would add some great flavour and truly make it a bourguignon colour! You can use tinned beetroot for ease, just drain and rinse well to get rid of as much sugar as you can. I also happened to have a little liquid smoke left from making BBQ sauce, so put this in too. It isn't readily available in Australia but I got some from the Country Brewer. They also do online ordering if you don't have one near you. Serve with some mashed potatoes and steamed kale, or be decadent and have with some vegan potatoes dauphinoise

Ingredients
300gr button mushrooms
300gr Swiss brown mushrooms
2 large carrots, chopped into chunks
handful of chopped celeriac leaf (you can just use some celery, I just had some celeriac in the fridge)
3-4 bay leaves
sprigs fresh thyme (or 1 tsp dried)
3 shallots ( I mean the bulb kind, not the grassy spring onion some folks call shallots) chopped
1 large garlic clove, bruised and finely chopped
1 tsp Massel beef style stock powder (no MSG, gluten free that's why I use it)
400 ml red wine
100 ml water
1 large cooked pureed beetroot (about 3/4 cup)
few drops liquid smoke (not essential, but adds a certain something)
olive oil
chopped parsley to serve

Method
In a large oven proof saucepan, gently saute garlic and shallots until translucent. 
Add thyme, bay, carrots, mushrooms, and celeriac leaf, and saute for another five minutes or so.
Add wine, water, stock powder, and liquid smoke. Bring to the boil, and leave for five minutes. Turn off the heat and leave to "marinate" for a few hours. you could even leave overnight in the fridge and continue the next day.
Cover and put into a 180C oven, for approx 30 minutes.
Take out, uncover, and add the beetroot puree. 
Put back into the oven and leave uncovered for another 10 minutes. 
Serve with plenty of chopped parsley, cracked black pepper, and crusty bread. 


Saturday, 8 June 2013

Superhero Snacks: Beer Dough Pretzels


I have to admit, I'm having fun coming up with hero related snacks, but probably not as much fun as  Phil and John have had coming up with some pretty awesome add ons like t-shirts (sweat shop free - woot!), a playmat, activity book, badge, and of course the amazing action figures. To check them out head on over to their Kickstarter campaign, but they only have two weeks left so if you think these two are as awesome as I do for their creation please consider a pledge!

Enough of the shameless plug...on to business!

I've made pretzels quite a few times, but I wanted something a bit different for Herr Pretzel from Pack of Heroes. Pretzels are an obvious choice, but what could make them more pretzelly (is that even a word? it is now!) than making them with beer dough using a German beer! I'll be honest, I was just going to use whatever beer I could find in the Beloved's homebrew, but spied the German bottle sitting on the shelf. Perfect! (As a side note the Beloved says the beer pictured is rubbish, even if it is gluten free). It did make a cracking good dough however, the texture was quite light when they were baked. I will probably make more of them using a different beer next time to give a different flavour.

Ingredients
3 1/2 - 4 cups bakers flour
1 tsp yeast
1 bottle beer
1/4 cup vegetable oil
1/2 cup warm water
2 tsp fine salt for the dough, plus rock salt or flakes for the top
1/4 cup bicarb soda


Method
1. Heat the water until lukewarm. Add the oil, salt, and yeast, stir, and leave aside until mixture bubbles. Add beer.
2. Make a well in the centre of 3 1/2 cups of the flour, pour in the yeast mixture, and with a wooden spoon, bring in flour to centre and mix. 
3. Turn out onto floured surface, and oil your hands (this prevents the dough sticking to you, plus drying out your skin!)
4. Knead for about 10 minutes, or until dough is smooth and elastic. You may need to add a bit more flour if it is too sticky - I used nearly 4 cups this time, humidity was high as per usual when I make these!
5. Put into an oiled bowl, cover, and set aside until doubled in size. This may take 1-2 hours depending on the temperature. I set mine next to our fire. (You can put the oven on for five minutes, turn off, and then leave the door ajar with the dough inside to speed things up).
6. Punch down and knead for a couple of minutes. Divide dough into 12 portions and roll into long sausages , about 40cm long. Loop into a pretzel shape. Place on a lined tray, and allow to rise again until double. 
7. Turn on oven to 190C to preheat, and set a large saucepan of water on the stove to boil. Fill the saucepan about 2/3 full.
8. When water is boiling, drop in salt and bicarb - watch out it froths!
9. Carefully drop the prerzels in one at a time to poach, about a minute and a half on each side. Remove carefully and set on greaseproof lined baking trays, a few centimetres apart. 
10. Sprinkle the top with salt crystals or flakes.
11. Place in the oven to bake for approximately 20 minutes, until dark brown, and set on a wire rack to cool.


Saturday, 1 June 2013

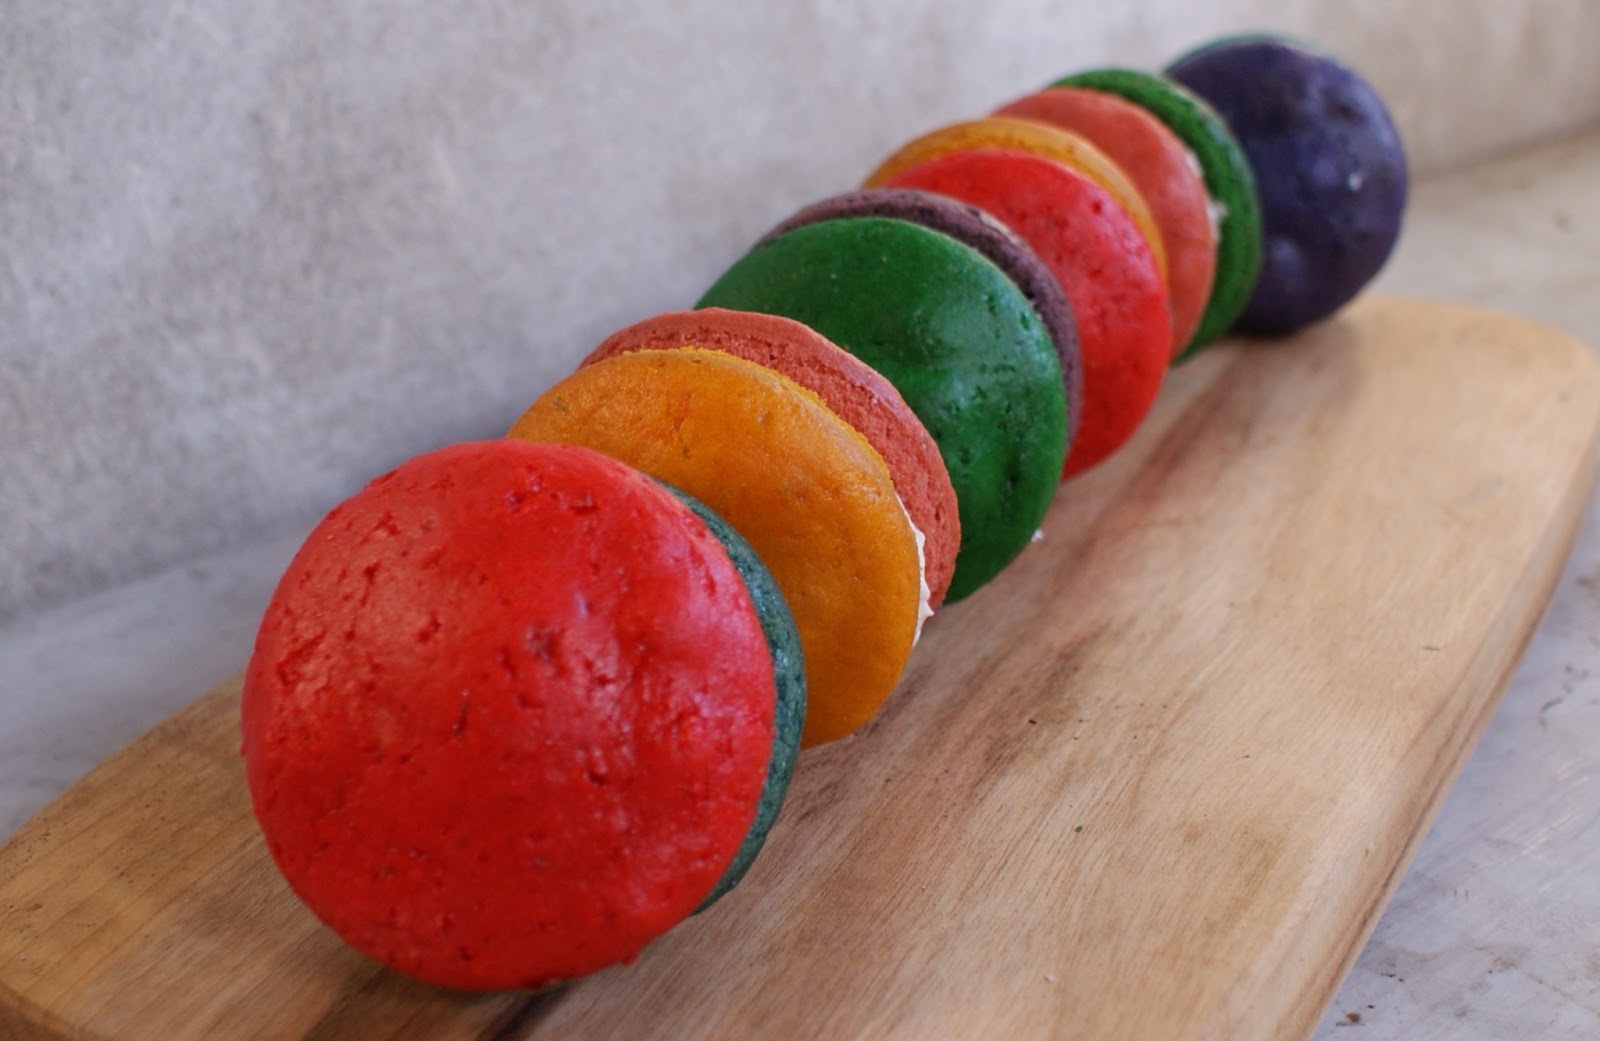
Superhero Snacks: Rainbow Whoop-Ass Pies


Who is next? What hero would eat these somewhat girly but totally scrumptious multi hued whoop-ass pies (that's whoopie pies to the rest of us)? Rainbow Sprinkle, the totally manly action movie star unicorn (who is obviously in touch with his feminine side). I imagine Mr. Sprinkle would power up on anything brightly coloured, I would love these guys in mini form on a skewer while playing Pack of Heroes of course, but Rainbow would skewer it on his horn and eat on the run, or mid kick, or...whatever. These aren't regular whoopie pies, they're whoop -ass pies!

Although I would normally colour with fruit I basically couldn't be bothered and used the totally bad for you food colour gel. But hey, if you're loading up on white flour and sugar you may as well go the whole way!

To make these I used a basic vanilla cupcake recipe, my weapon of choice is from Vegan Cupcakes Take Over the World.  These got me 12 regular sized whoopie pie sides, but if you were going mini you could get double that. I took a 1/4 cup of plain batter and coloured each lot separately in a jug, which got me two of the same colour. A word of warning here. I used gel colouring which is much more vibrant and doesn't effect the batter like a liquid would, so you may have to experiment with the batter consistency if you can't find them. Once baked I allowed to cool and sandwiched it with whipped vegan cream cheese because I can't stand buttercream. You could also fill them with choc ganache if you wanted to.

And once again guys, if you want to support this totally fun project please head over here!

Monday, 27 May 2013

Superhero Snacks: Pink Flamingade

Who's snack is next from Pack of Heroes? One of my favourites, pink power Flamingal! What would she have  to power up her game? With a throat as long as hers you would need a big drink to keep hydrated. Ordinary humans would drink powerade, but she has Flamingade!  Of course, us mere mortals can drink it too. The pink colour comes from iced tea syrup made with strawberry tea and earl grey. Drink it mixed with soda  for a fizzy fix, or plain iced water. The flamingo straw is optional, but without would certainly be less fun!And once again, to check out the game and give some support to this fun project go here.


Ingredients
T2 Strawberries & Cream tea (if you don't consume dairy another strawberry tea brand will do)
Earl Grey tea
1 litre water
1 kg sugar

Method
Make up 1 litre of tea at triple strength, 3 parts strawberry leaves to 1 part earl grey leaves (remember this is a syrup concentrate, you will water in down, not like regular tea) and leave to steep for half an hour.
Strain, and put back into a saucepan with the sugar.
Bring the pan to the boil and turn down to a simmer for 10 minutes. Allow to cool, and bottle. Keep in the fridge.
I make mine up one part syrup to three parts soda, but you may like it stronger or weaker.